
Changing object properties
When you click on an object in a project, the object information window will display information about that object. The object information window also includes options to configure that object — details of which are explained below.
The object information window
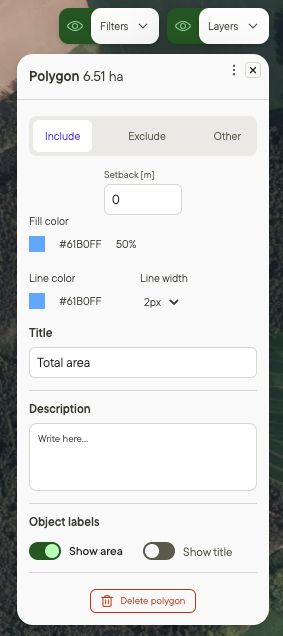 | 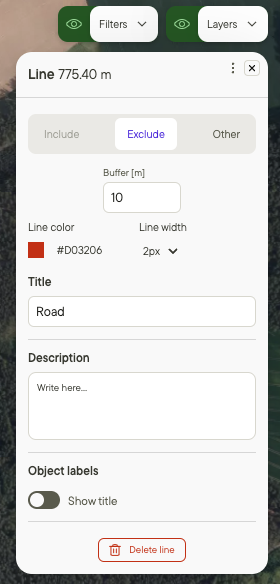 |
Type: The object type appears in the top left corner of the window.
Object area / length:
- If the object is a polygon, rectangle, or circle, its area will be displayed at the top of the window. Points do not have areas.
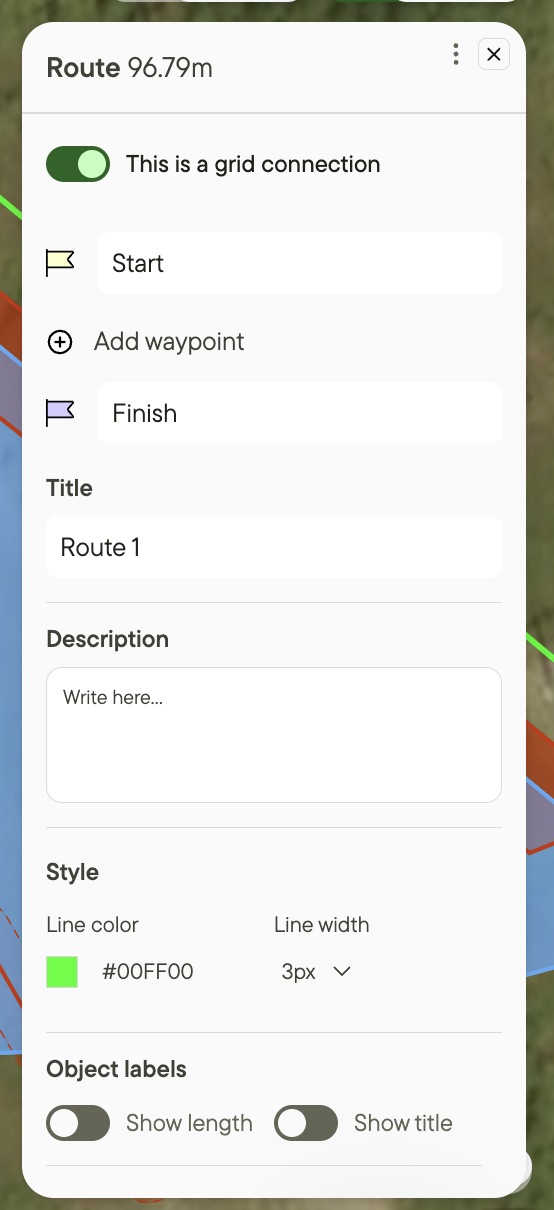
- If the object is a line or route, its length will be displayed at the top of the window.
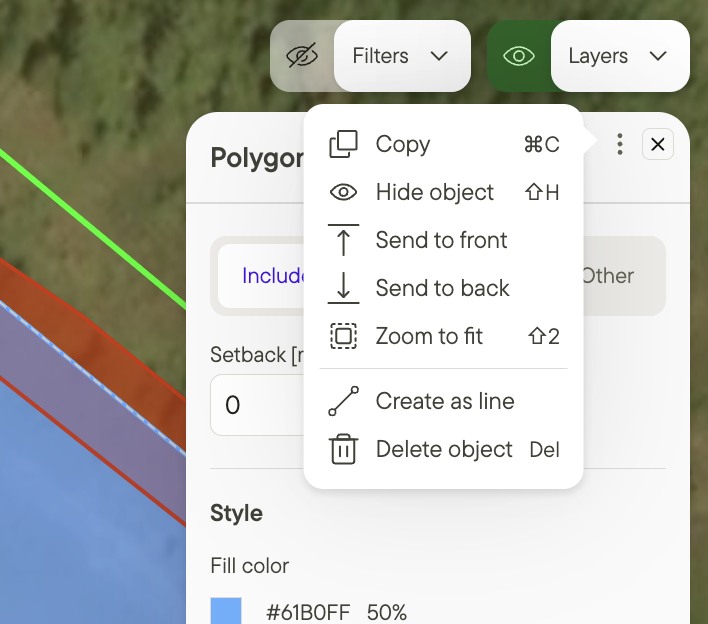
Overflow menu: Click on the three dots in the top right of the window to access controls on the object.
- Copy: Create a duplicate of the object. Press ⌘V to paste the object — a new object will appear in the object list on the left side window.
- Hide object: Remove the object from view. Click the eye icon in the object list on the left side window to show the object again.
- Send to front: Set this object as lying on top any other objects.
- Send to back: Set this object as lying on underneath any other objects.
- Zoom to fit: Adjust the display so that the level of zoom is appropriate to show the whole object in detail.
- Create as line: Changes the outline of an object to a line. Polygons, circles and rectangles have this option. Circles and rectangles also have the option to Create as a Polygon in this menu.
- Delete object: Remove the object from the project.
Object category: Objects can be set as Include, Exclude or Other.
- Include: These objects will have panels added to them when creating analyses.
- Exclude: These objects will not have panels added to them when creating analyses.
- Other: These objects will not have panels added to them when creating analyses and can be marked as This is a grid connection. Grid connection length is recorded in the Analysis report under Site info. Routes that have been created using the drawing tool do not fall under any of these categories, and are automatically toggled on as Grid Connections.
Setback : Setbacks can be applied to Include objects.
- Enter a number, in meters or feet depending on the units system you’ve chosen in My Settings, in the setback field to add a margin inside the edge of the object.
- Panels will not be added to setback areas.
- Merge adjacent objects to create a common setback.
- Use case: Maintain a distance between panels and the edge of a property.
Buffer : Buffers can be applied to Exclude and Other objects.
- Enter a number, in meters or feet, in the buffer field to add an area around the object.
- Panels will not be added to buffer areas.
- Use case: Maintain a distance between panels and roads, railways, buildings or other objects that are vulnerable, could cause shading or require panels to be a certain distance from them.
Fill color and opacity: Adjust the color of the filled space on the object. For polygons, you can also adjust the fill color opacity with the sliding scale.
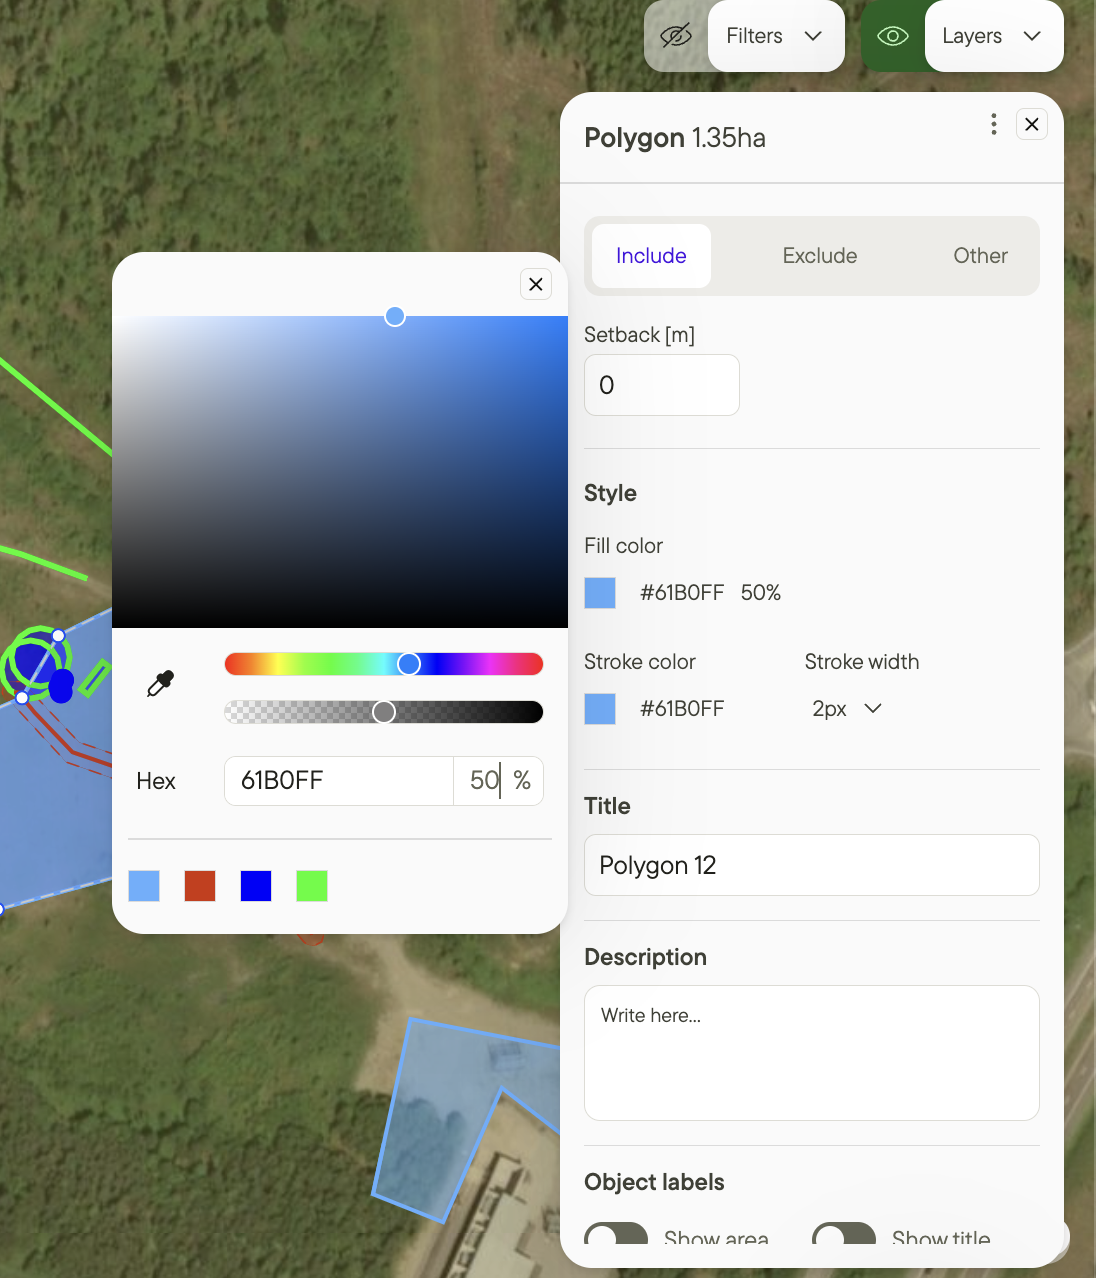
Line color: Adjust the color of the outline of polygon objects or the line itself for line objects.
Line width: Adjust the width of the outline of polygon objects or the line itself for line objects: choose from between
Title: Enter the Title of the object. If toggled on, the title appears in:
- The object list on the project in which it is included.
- The object list when exporting the project in which it is included.
- The top left corner of the object information window.
Description: Add any details or clarifications to the object. For example: Landowner information or notes.
Object labels:
- Show area: Toggle on and off the total area for polygon objects. The area will be displayed on the polygon on the map.
- Show title: Toggle on and off the title for polygon and line objects.The title will be displayed on the polygon on the map.
Delete polygon / Delete line: Remove the object from the project.
Multiple objects editing
In Glint you can edit properties of multiple object at once. The properties that can be edited need to be shared by the object.
Color editing : Select multiple objects with different colors and apply a uniformed color
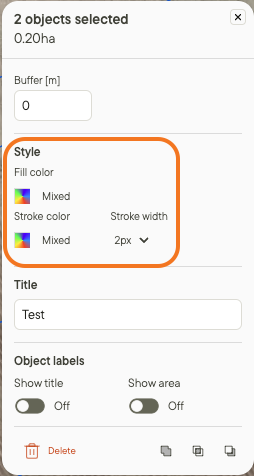
Properties edition : Change buffer, title and object labels for all objects selected. Apply the modification to all objects.
Bulk Edit & Lock Objects
Take control with new multi-select capabilities. You can copy, show/hide, send to front, zoom to fit, and delete multiple objects at once.
Additionally, you can prevent accidental changes by locking individual objects or entire groups. When locked, objects cannot be edited, resized, or deleted - ensuring your designs remain intact.
Additional resources
Now that you've defined the object analysis, you are ready to make an analysis! Read our articles Design in a click and Creating your first project for more help.