
Helpful features you might have missed
Work faster and unlock more value with these often overlooked features.
Delete points |
To remove a point from an object, simply click on that point and press backspace.
| Select mutiple objects at once |
You can select multiple objects in two ways:
- Shift-Click to select a range of objects.
- Command-click to select specific objects in a list.
Show panels |
For each analysis you create you can visualise the panels on the park.
- Go to Analyses.
- Click on the three dots in the top right of the analysis label.
- Click Show panels.
To hide the panels, click on the three dots again and click Hide panels or click on the panels icon next to the three dots.
Hold shift to get right angles |
Hold Shift when drawing objects to create lines that are perpendicular to site boundaries and polygons with right angles.
Right click on an object |
Right click on any object to bring up a menu with some helpful functions.
| Right click on an object in the map to bring up: | 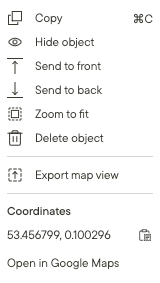 |
| Right click on an object in the object list to bring up: | 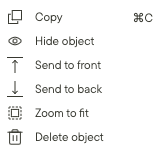 |
Copy+paste in different project |
Copy objects from one project into another. This function lets you take specific objects from one project, include them in another, and make changes to those objects without affecting the original project.
To copy an object:
- Click on the object and press ⌘+C.
- Click on the three dots to the right of the object in the object list and select Copy.
- Click on the three dots in the top right of the object window and select Copy.
To paste an object press ⌘+P.
You can also copy and paste by right clicking on the map or in the object list.
Elevation profile |
This tool is only available in 3D mode.
- Click on the Elevation profile button in the bottom right of your screen.
- Click on the map to create a points between which you would like to see the elevation profile.
- Press Enter to complete the line.
- An image representing the elevation profile and length of the line will appear.
Move 3D view point |
To change the point from which you view a project in 3D.
- Hold Shift and use the arrow keys to rotate the viewpoint.
OR
- Hold Control+click and move your cursor.
You can zoom in and out and rotate your point of view.
Move objects to front or back |
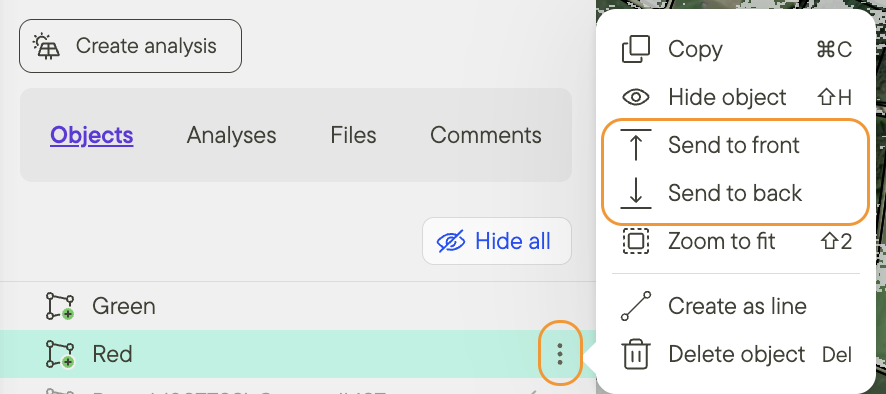
When you have overlapping objects in your project you can adjust the order in which they lie on top of each other. Objects that you created most recently don't need to be at the front and objects you created first don't need to lie at the bottom of the pile.
You can change the order of your object list by:
- Right-clicking on an object and choosing the Sent to front or Send to back option.
- Dragging and dropping the object higher or lower in your object list.
Send to Google Maps |
Right click on an object to bring up a menu where you can follow a link directly to that location in Google Maps. One neat use of this is to then use the street view feature to tour your project.
You can also copy the coordinates of your project from the same menu.
Steepness filter in % or ° |
There are two options for viewing and adjusting the steepness filter:
- Percentage — %
- Degrees — °
Go to Menu and click My settings to select your preference for the steepness filter either in degrees or percentage.
| Choose metric or imperial units |
You can choose to display your objects with metric or imperial units.
Go to Menu and click My settings to select your preference for the units system.
Additional resources
For an introduction to Glint Solar take a look at How to start using Glint Solar.
Remind yourself of the drawing tool basics by reading Using the drawing tool.