
Using Parcel search
The parcel search tool in Glint is simple, powerful and flexible. Understanding this tool and how to combine it with the layers and filters that are most relevant to your work is a great way to improve your workflow.
How to use parcel search
- Click on Parcel search in the left side panel
- Enter entire parcel IDs or parts of them into the corresponding column search fields
- Use the point, line and polygon filters to return parcels that meet your criteria.
You can export the parcels you select directly to a project or to Excel. Grab your chosen parcels using easy to use filters and quickly move them into the next stage of your site analysis.
Search from Point, Line and with a Polygon
Use the Search Area tool to search for parcels:
- Within a defined radius from a point you select
- Within a defined distance from a line you draw
- Within a custom polygon that you draw
| Search from a point |
| Search from a line |
| Search with a polygon |
Filter on the results in the parcel search table
You can enter desired values or select from drop-down options to filter the results returned in the parcel search table.
You can also choose which columns you hide and show and adjust the width of the displayed columns.
Add parcels to a project
Once you have selected parcels, you can add them direction to a project in Glint.
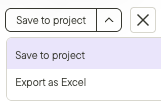
Note, you can add up to 100 objects to a project at a time. It may also be the case that your search includes more than 100 parcels — in order to load all of the parcels, you may need to scroll down to the bottom of the table to press the Load more button.
Export parcels
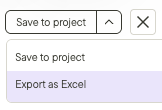
Once you have selected parcels, you can export them direction to Excel.
Additional resources
Learn more about how to start using Glint Solar.
Read about Adding data from the layers library.