
Creating your first project
Creating solar projects in Glint Solar
Whether you're evaluating an existing project or starting from scratch, solar projects typically begin with a lead. In this article, we'll show you how to turn your lead into a project in Glint Solar.
How we look at project leads in Glint Solar
Project leads can come from multiple sources—they may be generated outbound, received inbound, or arrive through partners. Read more about how you can collaborate with externals in Glint Solar.
A typical project lead can come in these forms:
- .kml file or similar
- Coordinates or address
- Parcel ID number
Regardless of how your project starts, evaluating the location and assessing yield potential is crucial. Here's how to create a project in Glint Solar.
Creating your first project in Glint Solar
Step 1: Defining the project location
a) Importing a project to Glint Solar
Import a project directly into Glint Solar by following these steps:
- Click on Projects from the left sidebar and either click directly on the Import project button or click on +Projects and click on the import project link
- Drag and drop your project file to upload it. Currently, you are able to upload Shapefile, GeoJSON, KML, KMZ and GML files. Please note that there is a limit of 300 imported features in a project. If you’re wanting to import more features, please upload them as a layer.
- When the project has finished uploading, click on the Zoom to fit button on the banner that appears at the top center of the screen
After uploading, you'll see the imported objects on your project.
You can read more about the files we support for import in this article.
b) Search coordinates or address
You can search for coordinates or addresses using the Search button on the left sidebar.
We use the WGS84 coordinate system by default, matching the format used in Google Maps.
Once you have the location as a point, use the drawing tool located at the bottom of the interface to mark up the polygons that define your project area.
c) Using Parcel Search
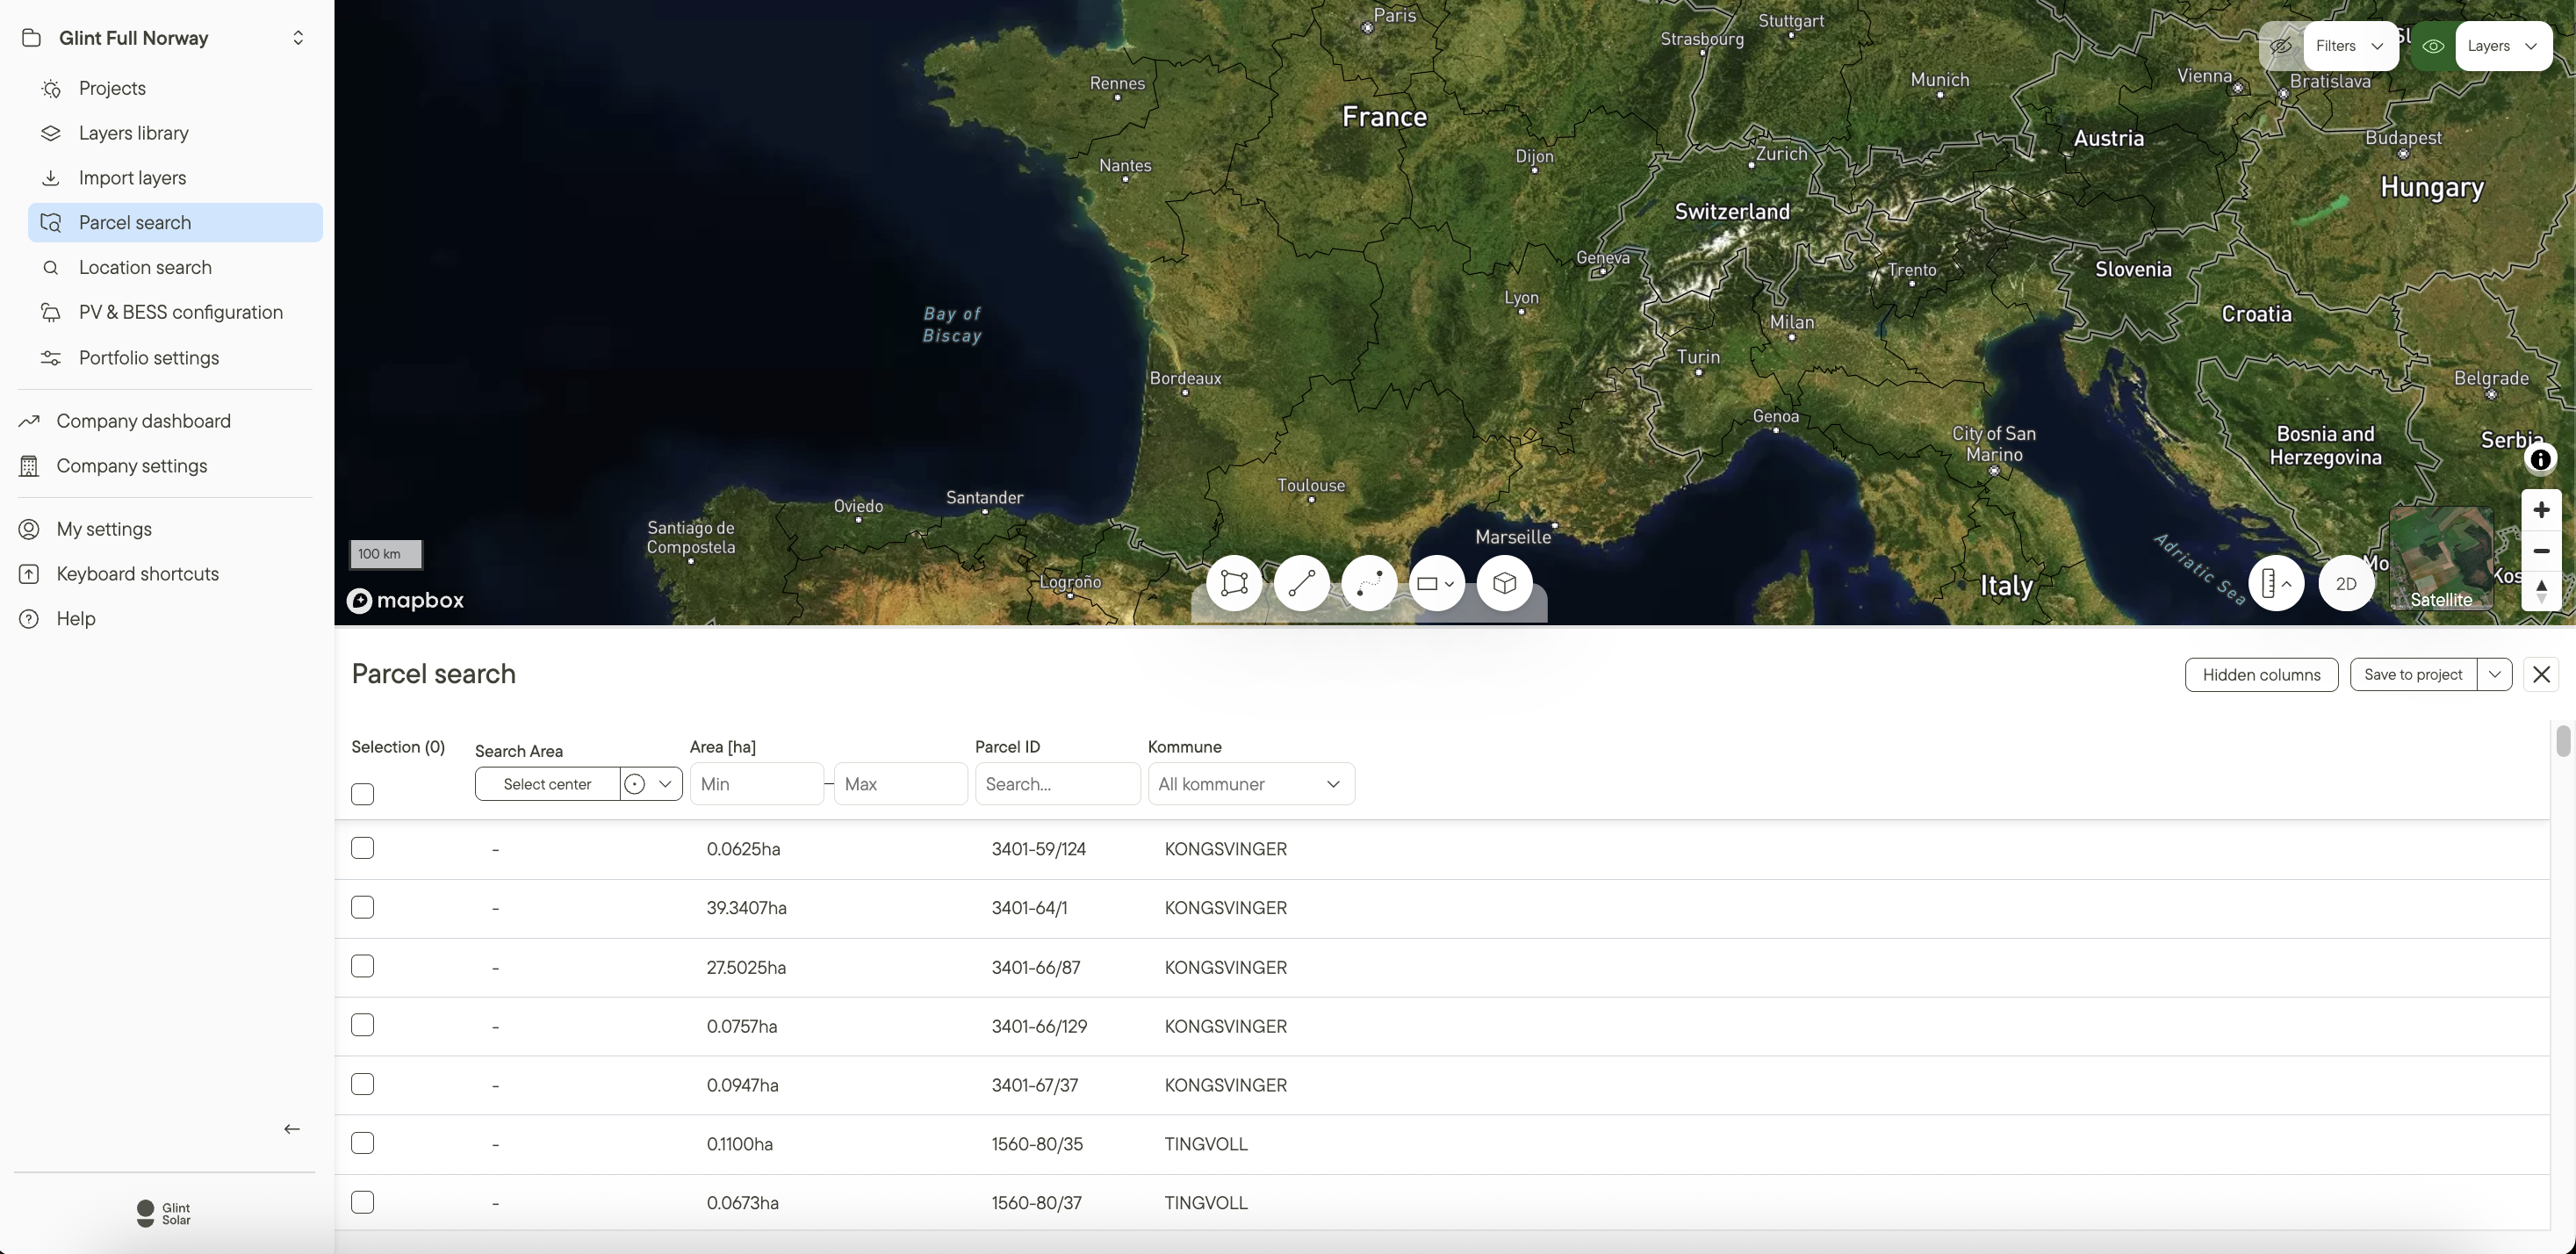
The parcel search tool in Glint is simple, powerful and flexible. Use the Parcel Search on the left sidebar to look up specific parcels relevant to a range of country specific criteria, such as parcel id, minimum and maximum area (ha), and municipality. You are also able to define your search area from a point, line, or polygon, and simultaneously multi select relevant parcels to add to a project or export to excel.
Learn more about how to effectively utilize the Parcel Search tool in this article.
Step 2: Defining the object type
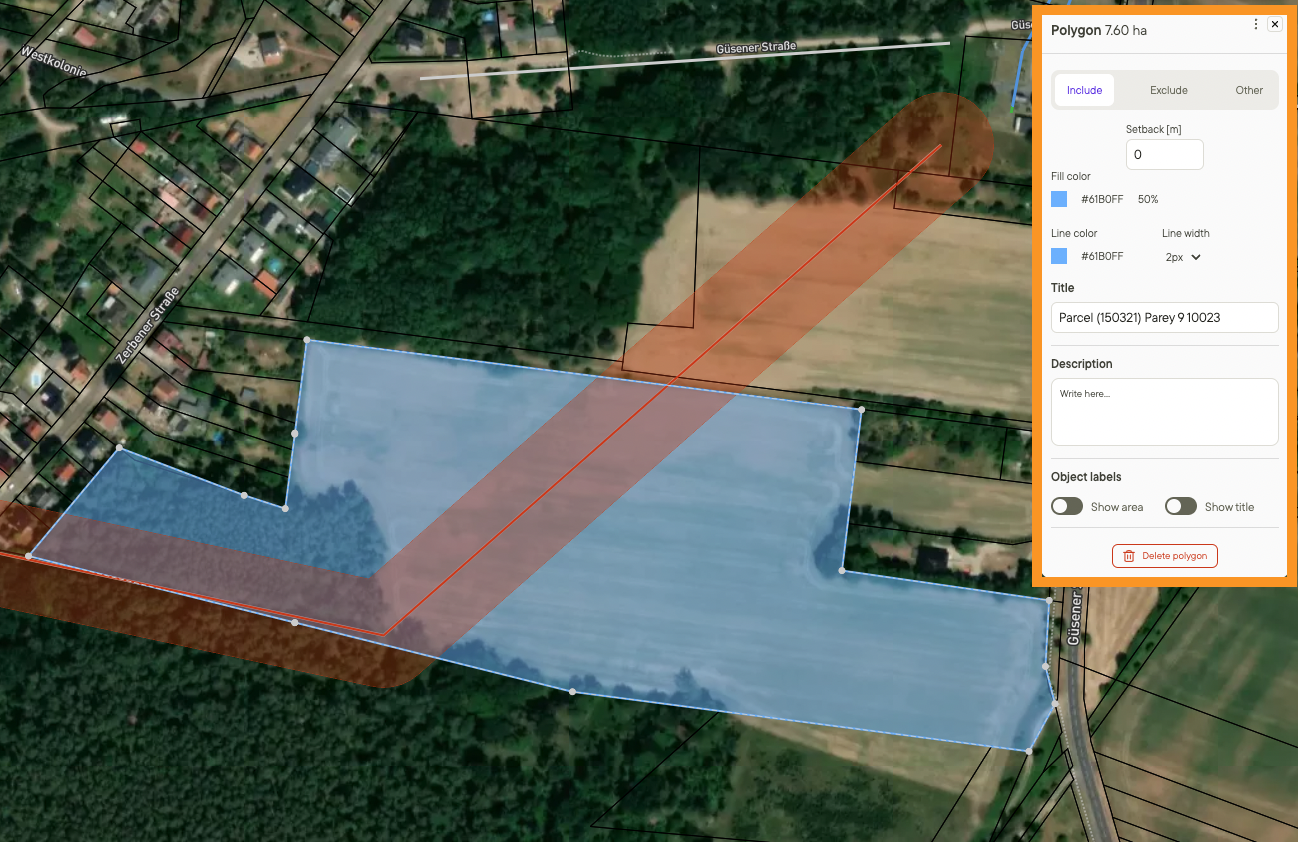
Projects consist of objects that can be defined as Include, Exclude, or Other.
Include is used for polygons that define the PV area. For Include polygons, you can set a setback zone to leave space for internal roads between the park and fence.
Exclude is used for polygons, lines, rectangles, circles, or points that should be excluded from the PV area. You can define buffer zones for Exclude objects, and their total area will be excluded from the PV area.
Other is used for neutral polygons, lines, or points that simply mark up objects on the map.
For grid connection lines, use the grid connection option on the drawing tool, which will automatically route the shortest distance via footpath from your chosen starting point to your chosen end point (ie a substation). The length of this distance is shown once the route has been decided, and it will appear as an Object on your list.
Learn more about object types and how to edit objects in Changing object properties.
Step 3: Creating analysis report in a click
After defining object types, click the Create analysis button above the objects. An analysis modal will appear on the right, showing the estimated capacity and site size. From here, you can modify technical configurations or click the Analyze button immediately.
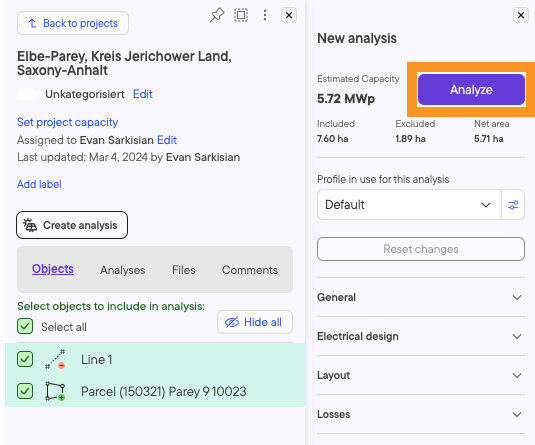
To streamline future projects, you can modify and preset technical configurations and design in a click.
Additional resources
Learn how to organize your projects using labels and project stages.
Looking to enhance your PV terminology? Read our Solar site planning guide section in the help center.
Once you have created your project, make sure you have team members to share it with. If you haven’t invited your team members yet, you can read about how to invite people here.