Working with parcels
Parcels reflect the legal entity of the parcel as found in the parcel data layer. Using parcels you can get an overview of every parcel your project involves whether it is for building out PV, shielding from BESS noise, or for traversing with cable routing. This article provides an overview of how to work with parcels in Glint Solar.
Adding parcels
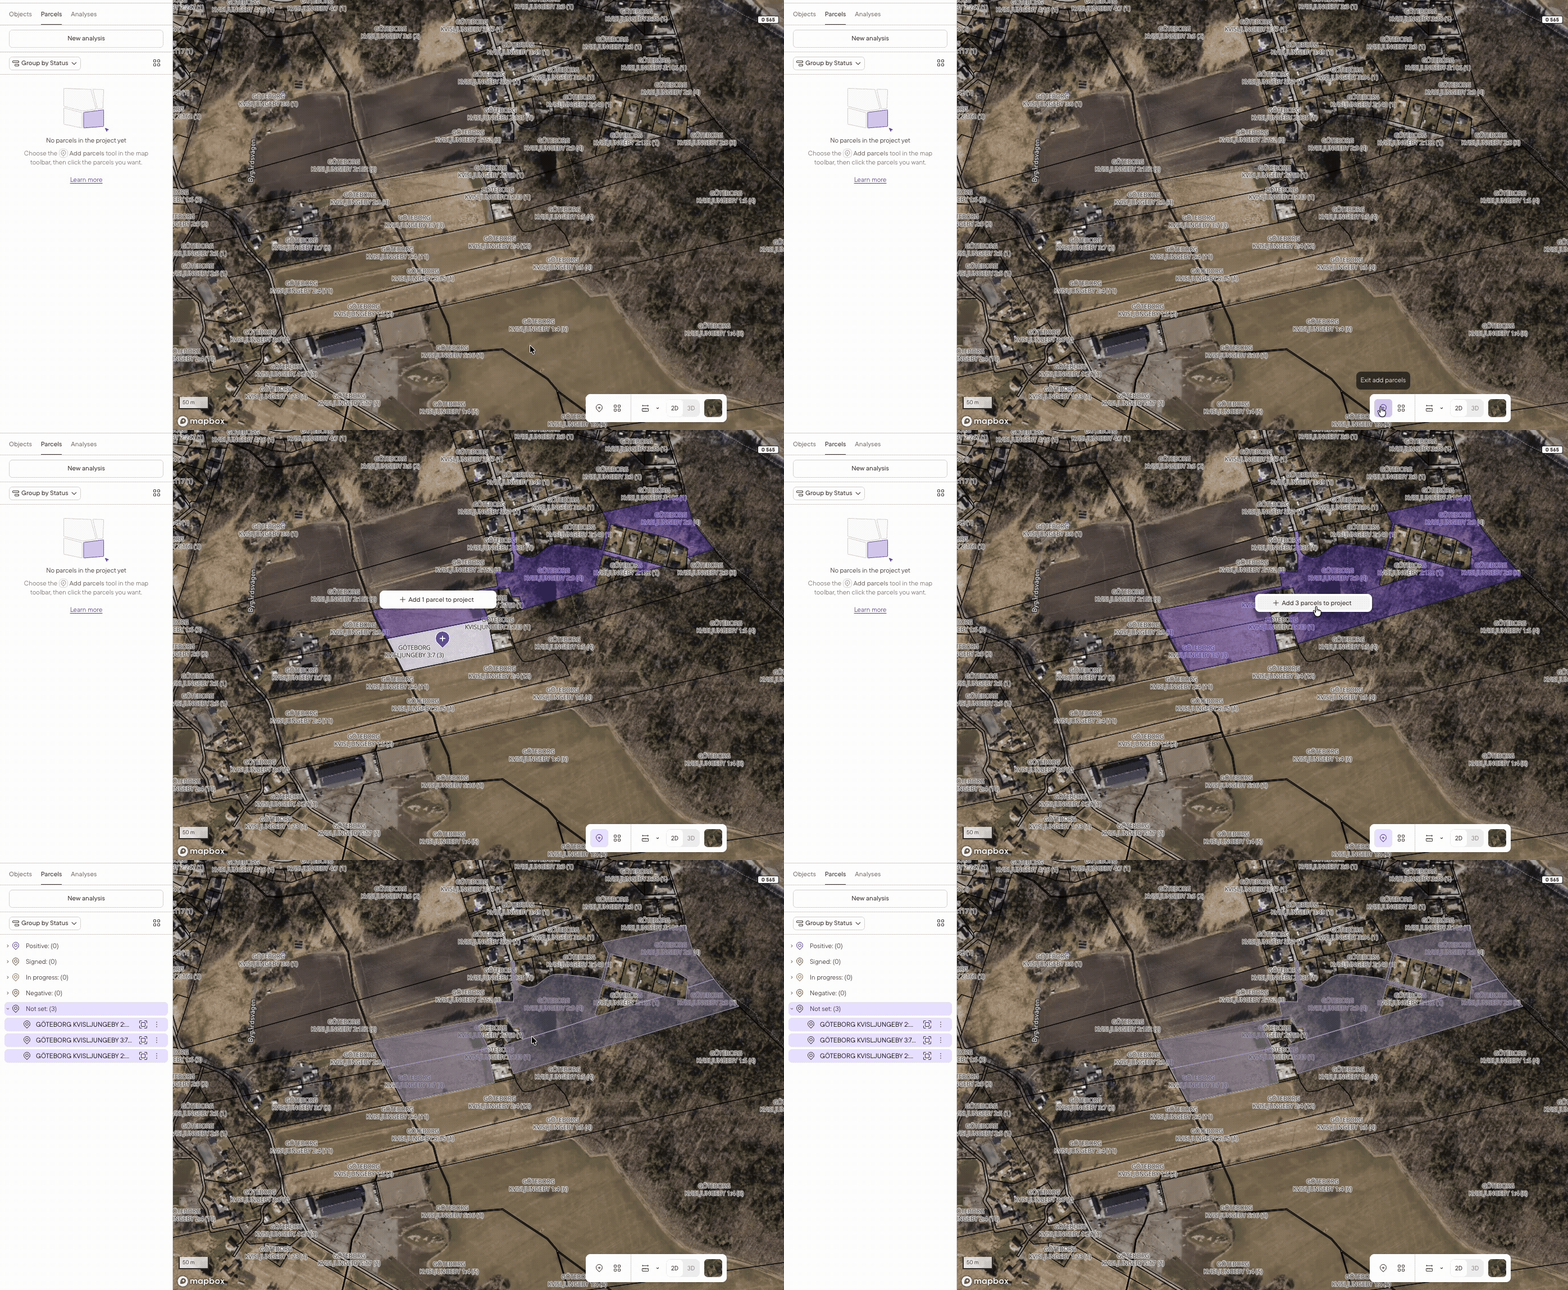
Parcels are added from the map using the "Add parcels" tool from the toolbar in the bottom of your screen when the Parcels tab is selected. You choose the parcels you want, and nothing is added to the project until you confirm.
To do this:
- Open the project and go to the parcel tab
- Click "Add parcels" in the toolbar at the bottom of the map. The cursor becomes a pin, and the parcel layer is turned on for you
- Click the parcels you want. Click a parcel again if you change your mind
- Click "Add x parcels to project" to confirm
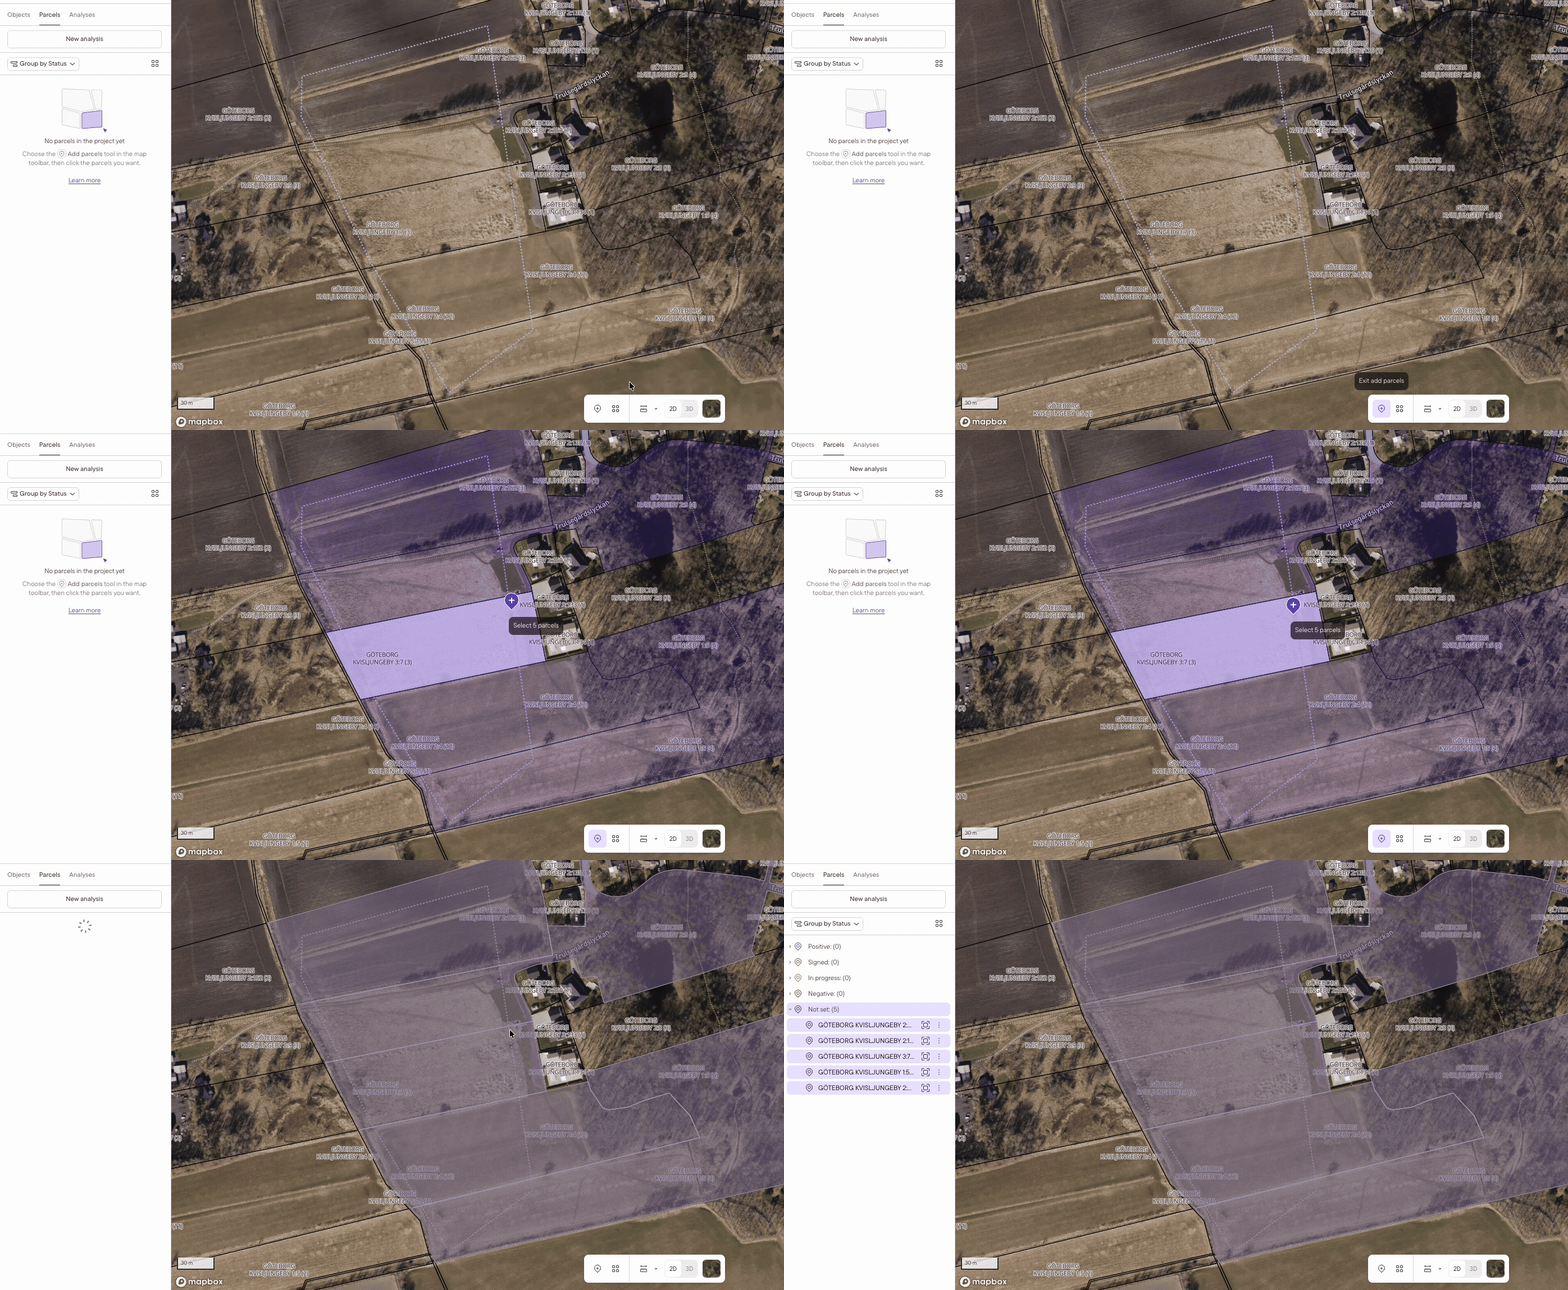
Parcels can only be clicked when you are zoomed in far enough. Further out the map shows the larger administrative areas the parcels sit inside, e.g. Flur and Gemarkung in Germany. These are shown for context and cannot be added, so zoom in if a click does nothing.
Adding parcels in bulk
You can also take every parcel underneath an object you have already drawn such as a road, route, or polygon. Hover the outline of the object to see how many parcels it covers, and click it to select them all at once. Click the outline again to deselect them.
Set status
The status indicates the level of control you believe you have. You can update the status at any time to indicate e.g. that you have a signed agreement or vice versa.
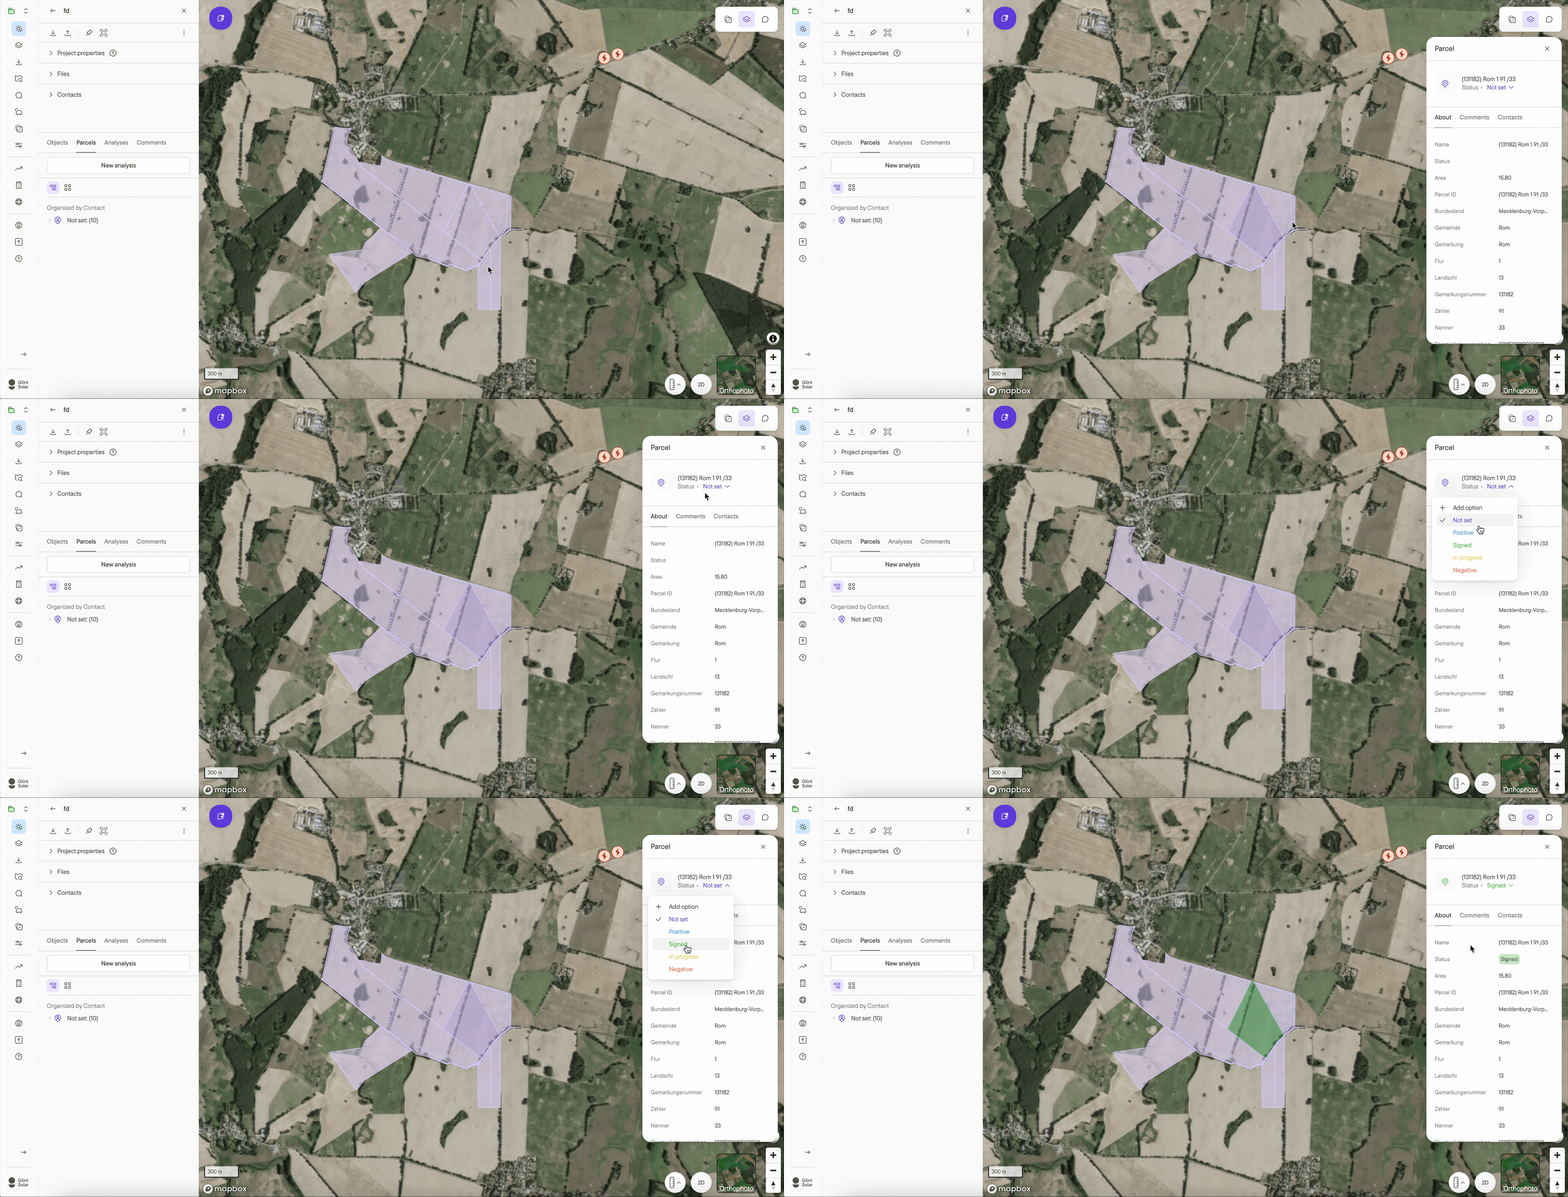
To change a status:
- Click a parcel either in the list or in the map
- Click the status (shown on top, it is "Not set" by default), and choose the desired status from the drop down menu
The status types can be customized to your liking using Company Properties.
Organize list view
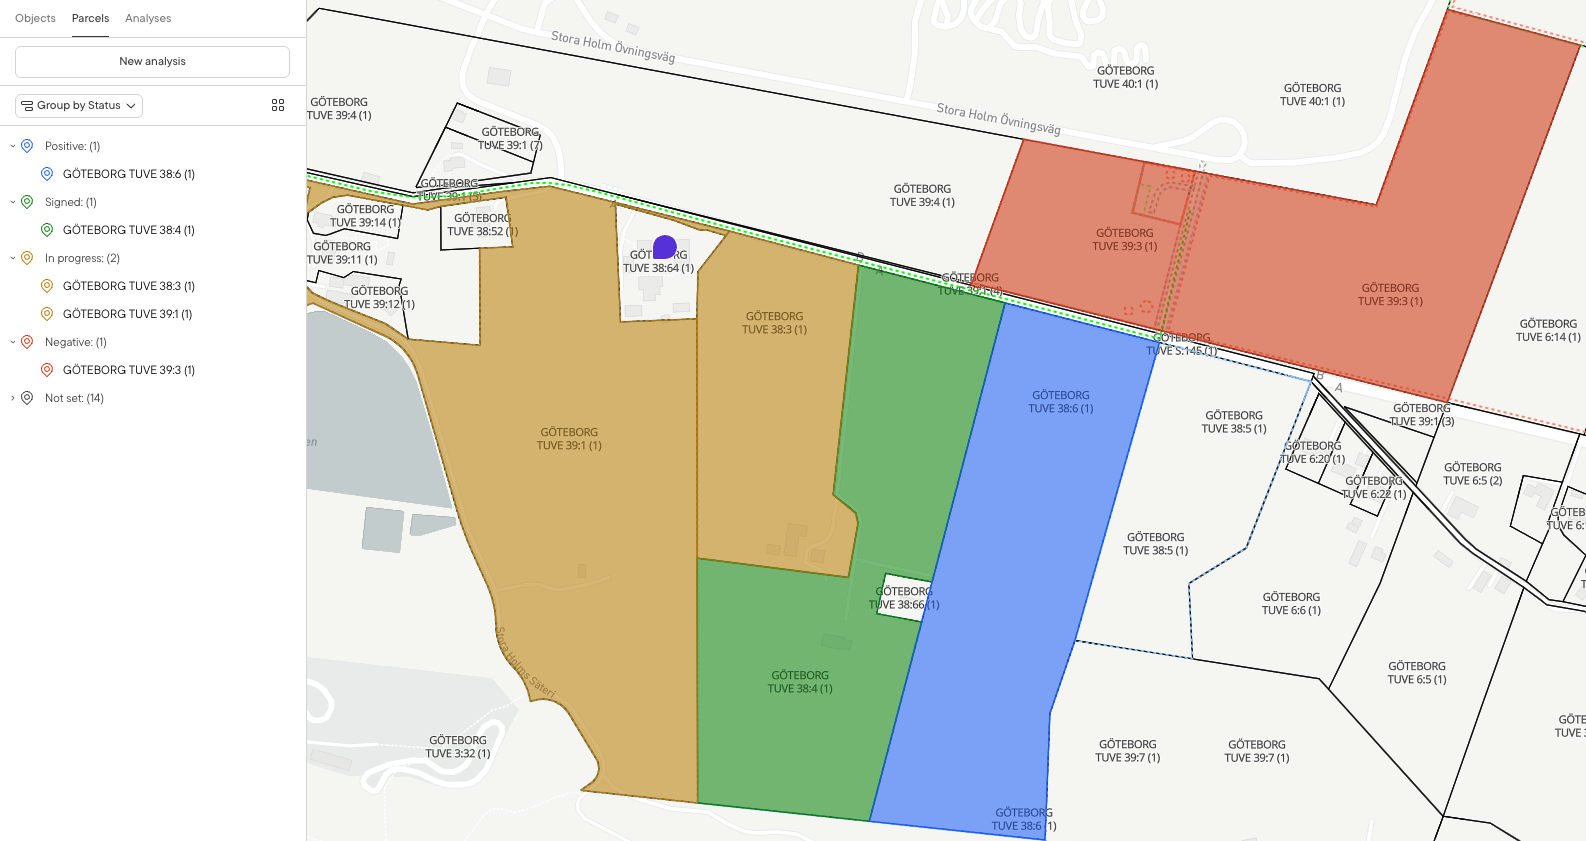
The parcel list is organized by the status for each parcel by default. This makes it easy to track how you are progressing towards control of the necessary parcels.
You can also change the view to organize by contacts or to a plain list. To do this, select the "Group by" button above the list and select your desired grouping.
Convert parcel to object
You can create objects (inclusion, exclusion, or other) directly from the parcel. This is is useful in case you want to investigate how important a parcel is to the layout and yield, or say exclude an area where a landowner has said no.
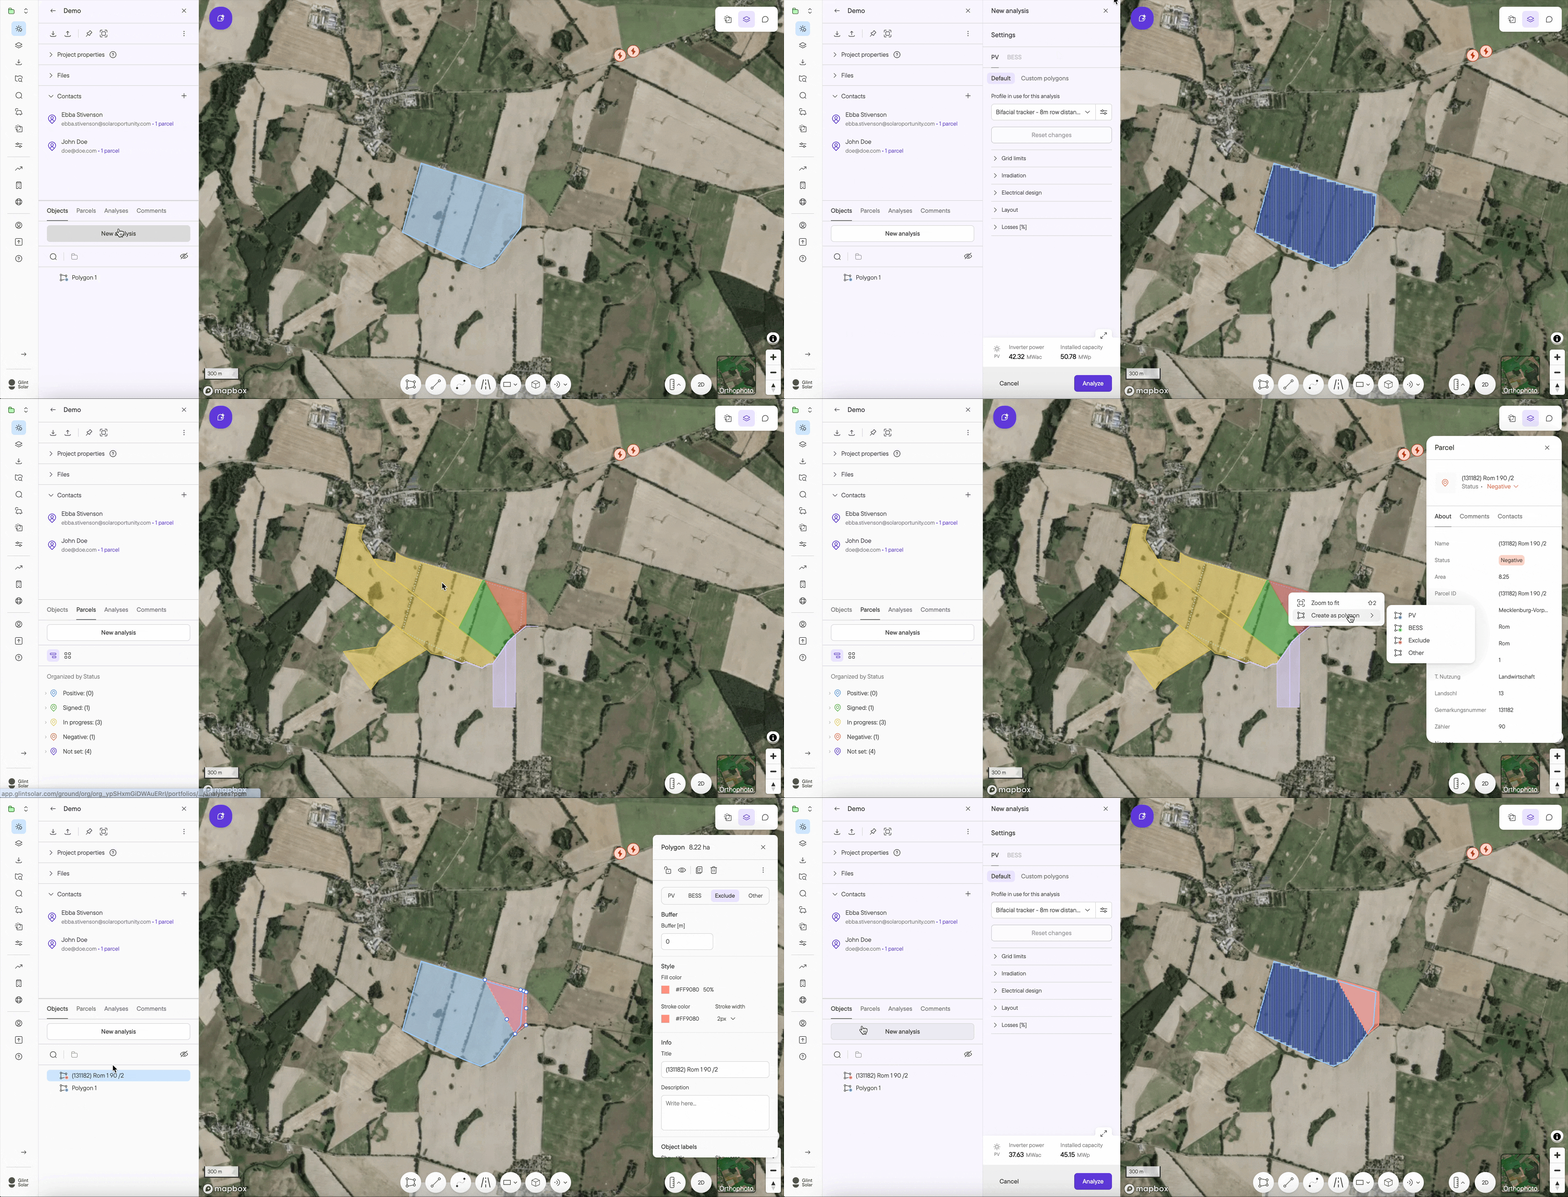
To do this:
- Right-click on the parcel when in the parcel tab. You may click both in the list or in the map.
- Select Create as Polygon, and choose which object type to create
- Go to Objects to locate the object which is named after the parcel name
Export
You can export the parcels of your project to Excel using the table view.
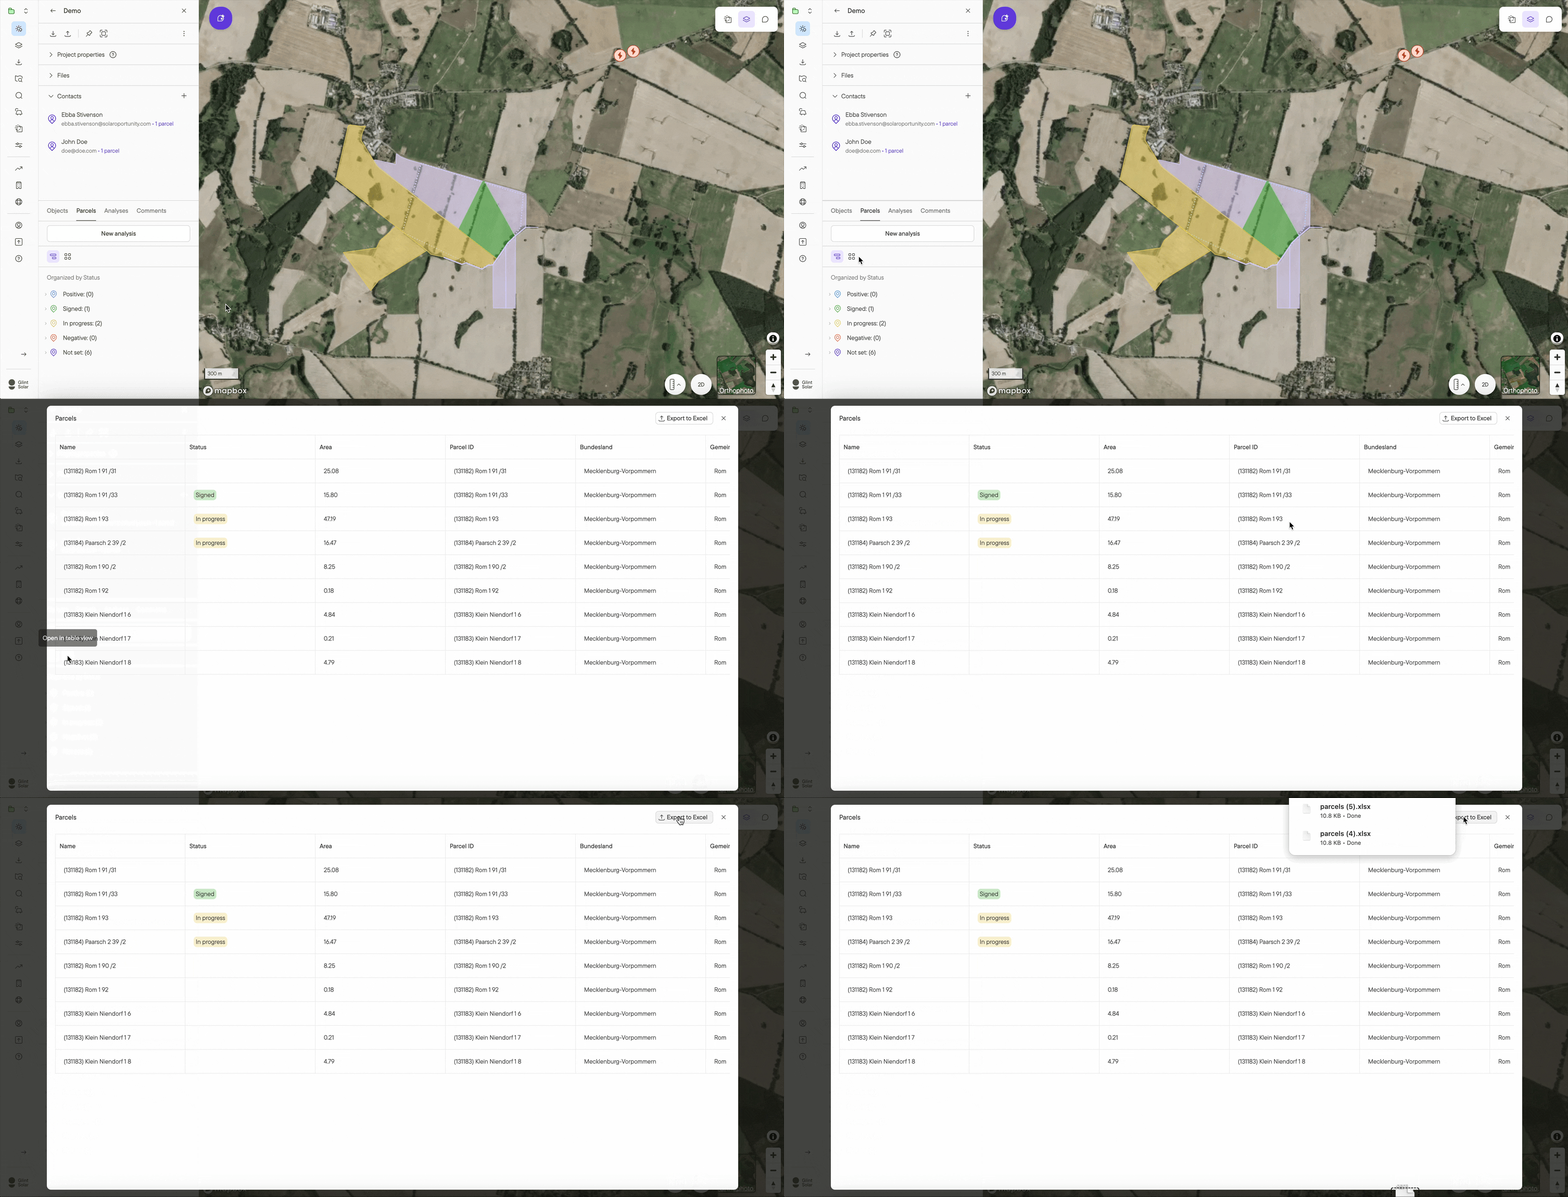
To do this:
- Open in table view in the left project menu, right above the parcel list
- Click export to Excel in the top right corner
Customize properties for parcels
You can add your own properties to the parcels e.g. to map data to an internal system. To do this:
- Go to Company Settings
- Select Company properties
- Locate Parcels in the next row
- Press Add Property to add a new one. You may configure any existing properties as well except for Name which is tied to the Parcels real name.
- Press Save below to keep changes
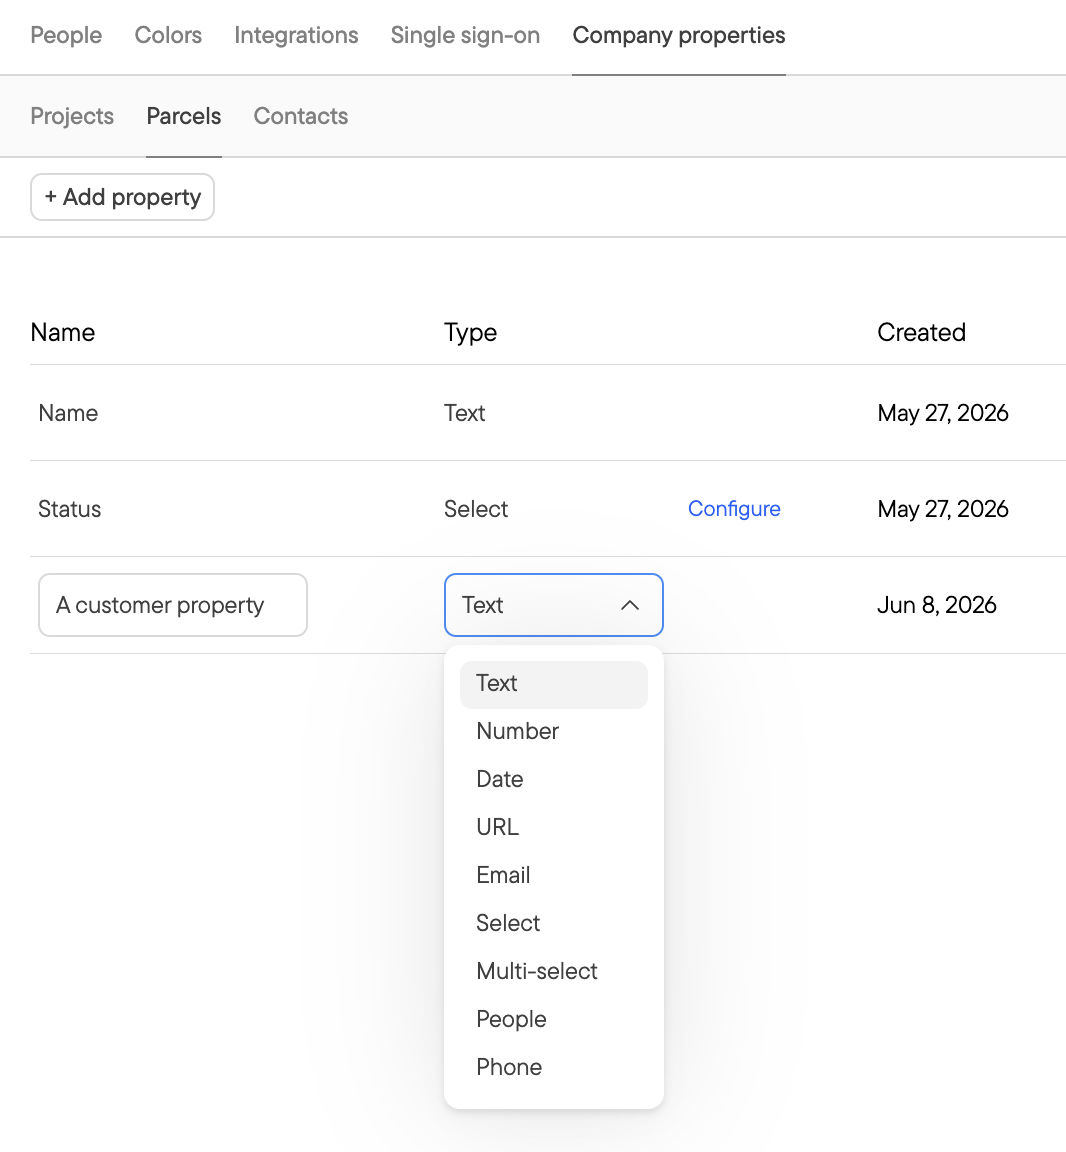
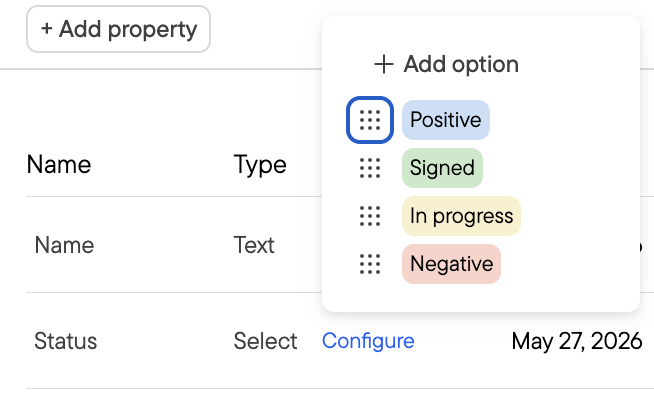
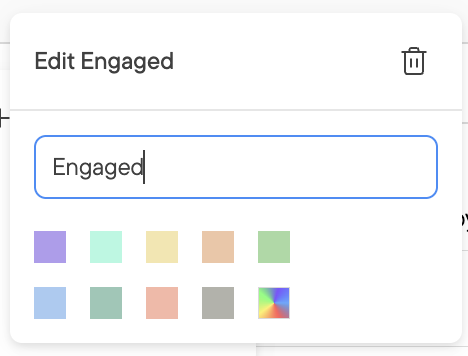
You can also customize the properties available for status to fit your own workflow. You do this by pressing Configure, and select the existing property you wish to edit. Both name and colors can be customized. This change will apply for your entire organization.